So, for those of you who don't know me, I'm Sokkmonkey AKA Anders Hudson (Yeah my real name is Anders and I'm not brain dead in a hot tub).
I work in the film industry doing wardrobe, digital/practical effects and just about anything else that will get me near enough to a craft services table I can loot.
Let me start off with my disclaimer. Lots of people have put a TON of work into getting the proper details from screen used originals for reference on this site;
MANY people put a ton of hard work and effort into reproducing exact uniforms using exact materials, I am one of those people who needs to rock like that.
However... the following is in no way meant to kai-bosh their sensibilities or efforts, but rather provide an alternative perspective, both from how things happen in "The industry" and MOST importantly a viable way for those who don't have the three bills it takes to make a perfect flight suit to get yourself into a bone sack that will blow away the wimminz at cons.
So, my mission-
Make a flight suit for under $500 spending less than an hour a night.
Now.. I have worked for Spielberg shoots that cost millions, HBO shoots that were done for under thousands and History Channel shoots where our total budget was under $200 including gas money. This scenario was arranged to simulate what would be required to make one of these puppies in the most heinous of conditions, and save as much money for scotch as possible.
So lets talk about real life...
Props people have learned the art of dumpster diving and thrift store looting to a SCIENCE. I literally wardrobed an entire shot filmed at ILM (that shall remain nameless) by modding things purchased at the Ross in Oakland. (right by Ches Eggroll). People have this misconception that EVRYBODY in the industry has plenty of money to spend for their department. The reality is that the producers and director party like its 1989, re-gift the writer a set of steak knives they got for opening a checking account, spend most of what is left to spackle Megan Fox into looking like an 18 year old day stripper, then go OH HOLY FRAKK, we only have $23.58 left and still need to make a movie!
Lets talk about cannon..
Before "The Plan" got started, there were flight suits up the yin-yang; Then the Cylons invaded, those who did not assume room temperature or get blown to chum in the first wave of attacks scrambled like hell for anything that would get them off that rock, then took to space.
Before long they became REAL short on pilots and supplies, people were brushing their teeth with algae for godssake. You aren't going to tell me that they pitched a fit when their pressure suit was not EXACTLY Pantone 575 Green..
Amirite?
Okay lets get started..
Day 1.
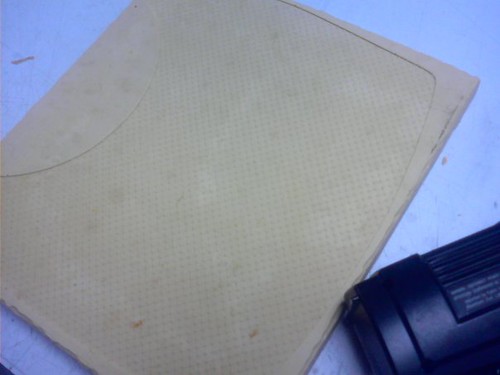
Bought that scale from sears to the tune of $30, peeled the Rubber off and made a mold. Using durhams water putty.
Let it sit in the sun for two days. If uncured silicone gets anywhere near water, it foams like a rabid tree weasel, so your mold needs to be DRY.
Day 3.
Poured 80 shore rubber into the mold with black pigment. You can either get it in BUCKETS from BJB
http://www.bjbenterprises.com
or in ounces bottles from Burman
http://www.burmanfoam.com/estore/home.php
Burman claims they only have shore 20, which is great for making a mask but crappy for making a skid pad on a vest. Call them up, tell them you need an 80, then they will say "It may take a while". They will call BJB, order their 80, pour it in a smaller bottle marked Burman and sell you a quantity less than Shamu's tank for a small upcharge.
Day 4
The frackking thing didn't set YET. Pigment is a biznatch, and increases your cure time by like twice+. Use as little as you think you can get away with.
Day 4.5 Demolds just fine looks awesome. Will take 2 casts to make a XL vest or a jacket size 46 with some extra.
Total cost=
Scale $30
Mold material $14 plus some scraps for a frame
50/40 silicone ~$40 Qt. (could do ~12 casts or four vests with that much!)
Black silicone pigment $6
=$90 = BS, that dot original material is like $15 for the patches including work time. So DON'T do what I did.
I'm ordering a roll of the dot material PM me if you want a piece of the action, it will save you money and headaches.
Day 5.
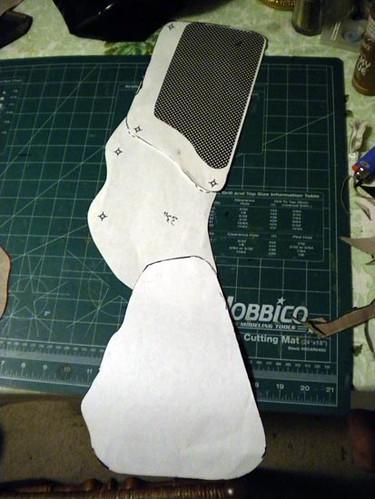
I made a pattern based on all of the "exact" specs people have come up with. I averaged out about 20 numbers of "exact" specs and got something that fits and can be scaled. I made a PDF of the XL size, and can make other sizes by scaling that pattern. Pester me and I'll post the PDFs here.
Day 6.
I spent driving around getting some of the "alt marcasite" From Jo Anns. When it shipped, it shipped in five colors, so while you can give the nice lady the SKU number, she cannot tell you which stores have what color, and it has ALL been red tagged. Good news, it's $6 a yard. Bad news is you need to dig through the discontinued pile to get it, and that pile smells kinda like unwashed babies and creamed corn.
FYI,
Here is the original sample card of the stuff used...

AND I have it confirmed by an insider at Sommers that MULTIPLE colors were ordered for the show, which would explain the odd purple, gray, brown and black you see as opposed to the "correct" off golden tan green copper color..
Exhibit A: "Marcasite" and "Quarts" used on teh same screen used flight suit-

Short form, use something that looks cool. I'll bet $10 you can find a sturdy upholstery fabric in the remnant pile for $2 a yard that will do just fine
Day 7.
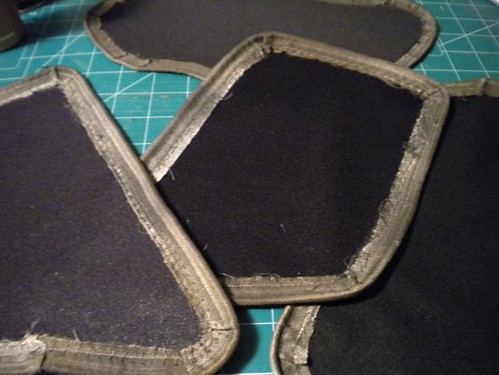
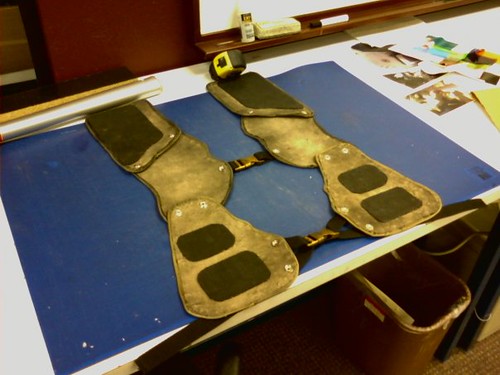
So, get your sash cord and make piping, if you use the alt stuff, it frays like a mofo, and needs to be surged or glued, I did both..

I'll explain my vest panel philosophy later, but first, here is a glues un-distressed version on the right and a sewn pre-distressed version on the left.
I recommend sewing, surging, distressing, TACKING with glue, then sewing in place for this to survive a con or a adventure of some sort.
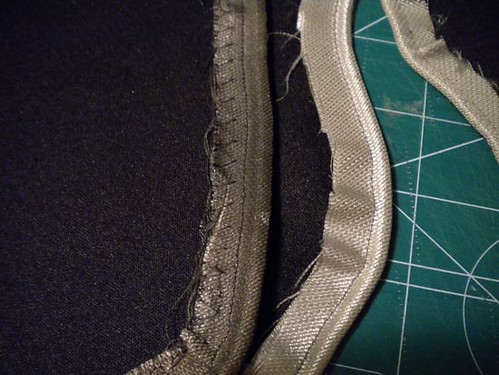
In the above left example, I sewed the piping into the Joann alt stuff, in 1.5" strips, trimmed the edges, then did a loose binding stitch. It then went outside where I used a really jankey "intsta camo" fabric spray paint in brown, light brown and black. On the version on the right, I sewed the piping cord into the strip, tacky glued the edges, then glued it to the base of the panel. There was a problem with my plan...
Day 8.
The original recipe called for using the dot material as backing. I used a supported polyurethane that was green with snake skin on one side and black and fuzzy on the other. Nobody is going to see the back, and the weight is good. Again, the real dot stuff is cheap (because you need to buy a ton) and is legit. SO anyway the dot stuff like my snakeskin will REJECT fabric paint. Distress your piping and your suede patches before applying. As I mentioned above, I spaced on this materials ability to resist, and it blotched paint globs everywhere. In the effects industry, I mix fullers earth with olive oil (or spray pam) and cigarette ash if I can get it (I quit smoking so it's rare now) THE BEST distressing schmeg in the universe, but it will rub off and or MELT off when it gets warm.
Anyhoo, this is a good time to talk about loose threads and cutting nylon strap.
Weather cutting this synthetic for piping or back scales, or cutting nylon strap for you BDU sets, there is one secret I learned about these and that is keep a lighter (or blowtorch) handy.
You can sew till you are blue in the face and under heavy duress (like getting your booze on at a con) these things will find a way to unravel. BURN your lose ends. A policy I recommend for many things in life. This also is good for when you need to use parachute cord for a boot lace. It will make a nice globby plastic blertch you can let cool a bit then force into submission.
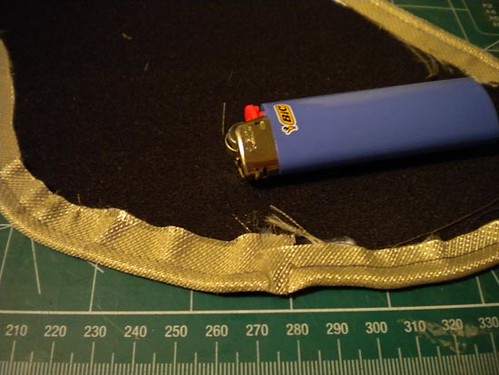
You don't need to NUKE your loose edges just singe them.
Once you have all of your pre distressed piping tacked to your back panels with glue, then run a stitch for good measure.
You get a pile like this..
Day 9.
Cut out the suede in the same shape as your backing, then get the black and dark brown spray fabric paint (I also use floral paint because its CHEAPER and does the same thing) Stand about a foot and a half over your panels and circle the edges, the first pass should mist/cover about 2" in, then close in to about afoot above it and do another perimeter covering in 1" from the edge, this will give you a nice gradient. Some prefer to use an airbrush for this, I just use rattlecan and practice. The desired effect is that the edges are more dirty than the inner part as they "rub on things".
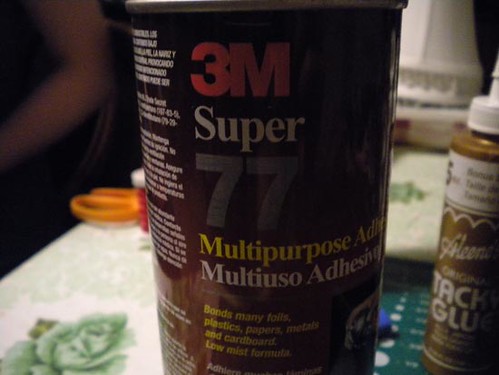
Now, let's talk about adhesives, they come in many flavors, for tacking beads earlier I used tacky glue. Now, to adhere the suede ot the backing I'm going to use spray adhesive.
This comes in 2 flavors-
77, great for gluing fabric and paper. I will use the 77 to put the distressed suede panels on.
It comes out in a mist.
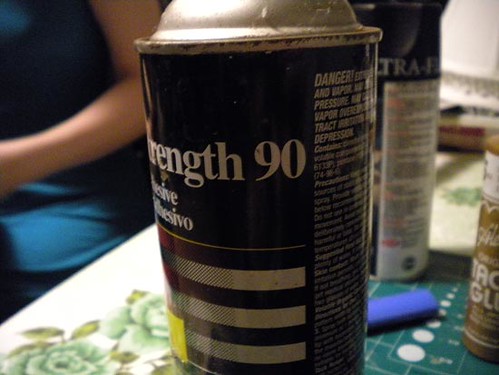
90 great for gluing toddlers to walls and mounting Granite onto counter tops.
I will use it to put the rubber impact panels on the suede.
It comes out in a thick bubbly stream; BEWARE this is your enemy and should only be used other than indicated on the can by consenting adults behind closed doors.
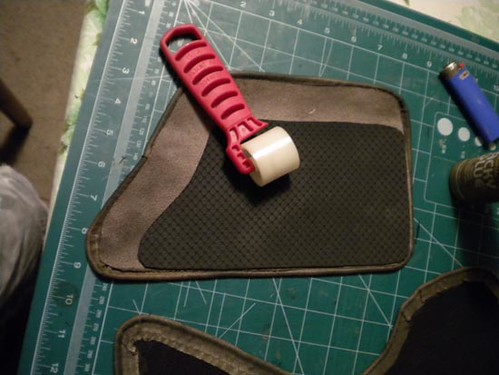
I used a little roller hootchie to get things flat and all of the bubbles out. The glue is basically rubber cement's cranked out cousin from the rectangle states, it can be controlled by rubbing and rolling when it gets unruly.
Eventually you will get this-
Next- Day 10, snaps, and Carol the sexist scrapbook lady.
So, snaps, rubber, and sexist Carol.
AKA Day 10
The bottom rubber shock panels were of a ore or less indiscriminate shape. If you look at Apollo’s they are amoebas where on Athena’s they have more of a radiused rectangle. I’m GUESSing there is no rime or reason to this other than cut shapes and glue. We as dorks have a job to try to make sense or order out of sci-fi , in reality we interpret a backstory where there is often none, and make policy out of free form decisions from costumers and set builders.
Much like the colors of the asteroid fabric, I have seen screen used flight suits with nickel snaps, copper snaps, bronze snaps and black snaps. I have even seen a screen grab where Cat has Black and bronze.
While bronze seems the most common, followed by copper, I was going to use whatever I could get my mits on and get this project done. I was after all on a time table. For those of you who have never worked with snaps, a bit of advice. Get a set of snap pliers. The hand pummel set post and base where you beat the snap into its self just plain sucks. The good news is you can pretend you are Thor forging the mighty spear “Gündeer” that you may go forth and slay the Giant Eeel Jorgamud. The bad news is no matter how careful you are, your snaps will always look hand pounded. This is one place where the crispy machine adhered look will contrast nicely with the distressed suede. Oh, and it’s tons faster and can be done undetected by the neighbors at 3AM.
Now, before you go any further, and unless anybody can recommend a source for copper snaps.
-Order these-
You will need 30 per vest assuming you don’t screw up, or a post gets swallowed by the cat. That means order at least 40. I think the cat is iron deficient.
Anyway, I decide I’m going to do this on the cheap side so I go to my local Beverly’s.
(What was wrong with that last statement?) I pick up some 1” black nylon strap, a bag of snaps (Dritz plated) and I’m looking a the plastic fastex style buckles.. ($1.60) each..
I’m thinking, what the heck, I need FOUR, this is an experiment, they aren’t that pricey.. While sitting there trying to do the math without taking off my shoes, up comes a middle aged woman wearing a GIANT decorative name tag labeled “Carol”.
Seriously this thing had barns, and grapes, and beanie babies and a full sized live kitten hot-glued to it. Rather that saying “can I help you” She says “You look as lost as I do in home depot” I was about to say “I’m not lost, just trying to calculate how many hundreds of times your mark up is” but before I could answer she asked me “Are you looking for something for your wife?” I just about hit the roof, I was about to give her my speech on the difference between art and craft, followed by an inventory of the sewing equipment in my house that is MINE, but instead I was much more subtle and I think it was lost on her. “Hey do you have any metal Bernina bobbins or just this plastic generic stuff?” She replies, “Oh heavens no! we sell mostly to quilters and scrapbookers! I just love scrapbooking!” I look at her name tag… “you don’t say?”..
So lets see how bad I got corned.
The webbing I broke even on after what shipping online would have been,
5 yards @1.75 a yard (I needed less) $8.75
Bag of 7 heavy duty snaps x2 @ 4.29 (61 cents each instead of 40 for the right ones)
4x strapworks buckles $6.40 ( I got 50 of the correct fastex buckles on ebay for 11 cents each, Beverly made me her prom date on that one)
All in all I paid WAY too much for the wrong stuff. Moral of the story, order the right stuff online and nobody gets hurt.
So, I have that pattern in XL,
Use at your own risk, may not be suitable for some viewers, side effects may cause nausea blah blah blah.
So starting the snaps-

Day 11
washed off the buckles with soap just in case, and painted them a godlish bronze using a giant brush and a dry-brush technique. Cut my straps to length and torched the ends.
Assembled this together as such-
Coming soon, Cuffs, ankles and my cast of the broken dork watch.
Days 12-15
Thanks to an unexpected prom date from MB who is stetting out to do TFIII and make my life hell for another few months.. Anyway.. I'm back
The dork watch. Hard to find these, especially in working order. I have hear twice as many horror stories as "OMG I love my watch" stories.
So anyway, I scoop up a dead one off of ebay and within seconds I scoop it's dead tech self out of the package (The ebay seller's "I think it's just the battery" story turned out to be express BS and the watch was dead as Tom Sizemore's career).
So I plopped this sucker in some molding compound and made a one-part mold. Cast a few of them in RTV resin and wahmmo-
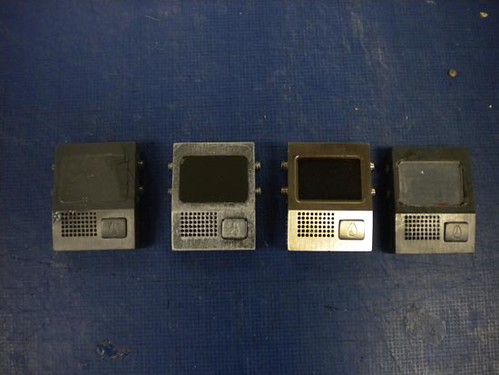
First in the solid cast with no painting, discoloration is from the resin pigment,
Second is primed black, bezel masked off and then dry brushed silver/bronze,
Third is the original,
Fourth is a failed attempt at a plexi bezel. Even painted the results were not worth the effort. (I have extras iffin you are interested, PM me)
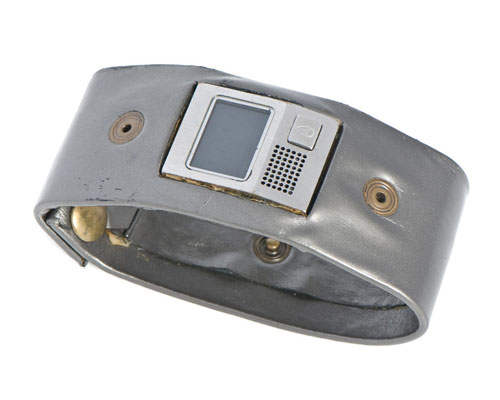
I have scooped up some nicely reenforced gun metal stretch vinyl. I looked at the original stuff and made the executive decision that it was too flimsy, I picked this stuff up at sexist carol's for $11 a yard. The snaps from the vest will work great. You may also want to use black snaps. The cuffs should be about 3" wide x long enough to get around your wrist. You may want to make the ankles at the same time, they should be slightly wider. "Cannon" is 3" for wrists and 3.5" for ankles, Now if you were a number runner for the Albanian mafia, you may find this to be too narrow, likewise if you spent most of your life trying to be a supermodel who lives off of rice cakes UN salt packets, you may want to make them more narrow. Now, before things get ugly having brought up body image issues in a forum full of "fans" let me just say this..
This is YOUR flight suit, you may want to adjust for your body type.
You may not have a body like Athena or Apollo, I for one look like a viking who has been living off of the Viet Cong's table scraps all my life, so I will adjust for "tall" and "narrow".
The cuffs and ankles should have two snaps closing on the end, and then 3-4 reinforcement snaps along the middle. The male side is put on the inside of the cuff, the female side outside of the flight suit corresponding to the males on the cuff to connect them.

The textured areas should be folded under to make hems, the dotted lines are where you fold to create edges. On the side with the watch, cut a hole smaller than the watch, then make diagonal cuts to the size of the watch, fold the flaps under and glue to create the watch window. You may want to punch the wristband of a watch where the snaps are going to penetrate, it's thick and will be hard to get through. For the fake ones (resin cast etc), epoxy them to a strip of webbing, then punch the snaps through the same way. It's tricky but will hold the watch in place. On the off hand you dont need to punch the hole, just fold the material, glue and set your snaps accordingly.
Here is racetrack's dork-side cuff, Three supporting snaps, two closures. Also notice glue schmeg on the sides of the watch, and distresses in the fabric on the edges just to the top of the watch face. These are the things that geeks have a hissy fit about because a screen used original could NEVER be enything but 100% perfect. amirite?
Okay, so I totally get sanchoed on the alt flightsuit material, while looking for it in the internets, I managed to find real snuff films, coelacanth meat (regular and unsalted) and one of jimmy hoffa's socks. I also managed to get a giant bolt of yardage of the real chroma. Which does me no good for this, because this is supposed to be the CHEAP way to make a flight suit. Well, I found a batch of stuff that is too thin and not polychromatic, but a good shake better than most of the CB and other cheap options, so until it gets here lets talk helmets..
Our own Retro makes good vacuform versions with light sets, and his new sets are better than the ones I have. (I have an old one I got from Eggroll) I got the old version which is kinda wonkey, and has a shallow draft. This is awesome. Now I'll bet you are saying "Sokk, why is wonkey shape and bad draft edges a good thing?" Well frakkers, It gives me an opportunity to show you how to make a vacuform your biznatch.
You see TONS of this stuff in the
You can build a vacuform machine with any shop-vac and a board with plenty o' holes drilled into it; you are pretty much limited size wise by your ability to heat whatever you are shaping evenly. If the little woman doesn't mind you standing by the open oven with a duct tape laden redneck sucking machine, you can probably do about 30" square.
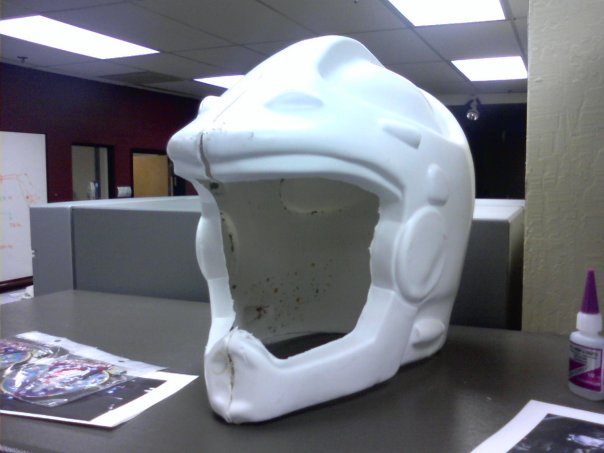
I scooped up one of Retro's sets, and it has potential. Two main halves with a bunch of bits.
Lets start with the main halves.
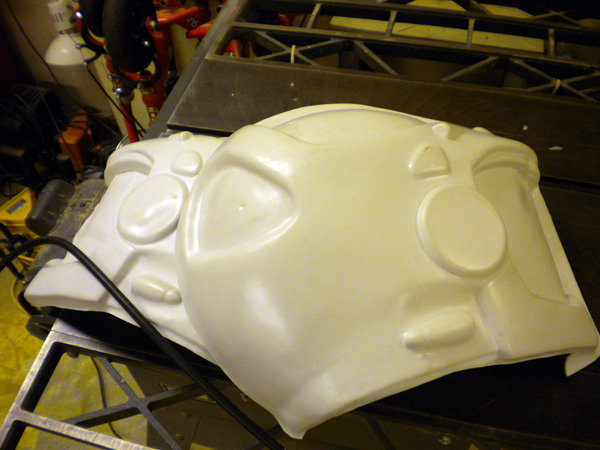
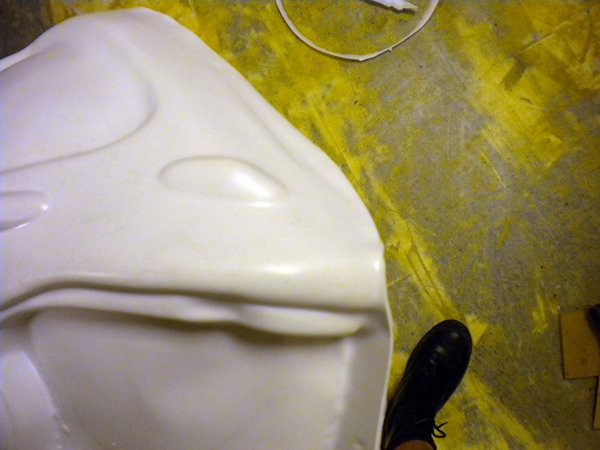
These suckers need to get their outsides trimmed. I don't trim the face area because it will help stabilize the shell during the shaping process.
You can see where the draft on the buck (the item shaped) drifts onto the table (the sucking table!). You want to cut off the stuff that was shaping it's self to the table, but keep the plastic that shaped it's self to the buck.
After trimming off as much as I could, I used tape to put the two halves together. this way I could see how tweaked the halves got in the forming process, and check for mismatches.
When I saw the first test fit, I almost messed my drawers.
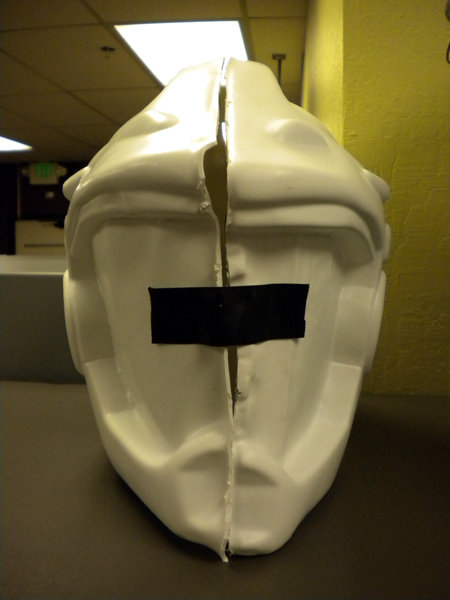
After about thirty minutes in teh men's room at work crying so hard I blew snot bubbles, I decided to go back for another look.
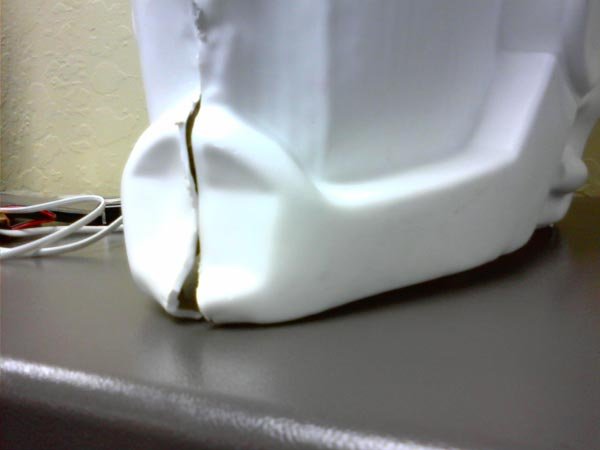
Here is the chin-
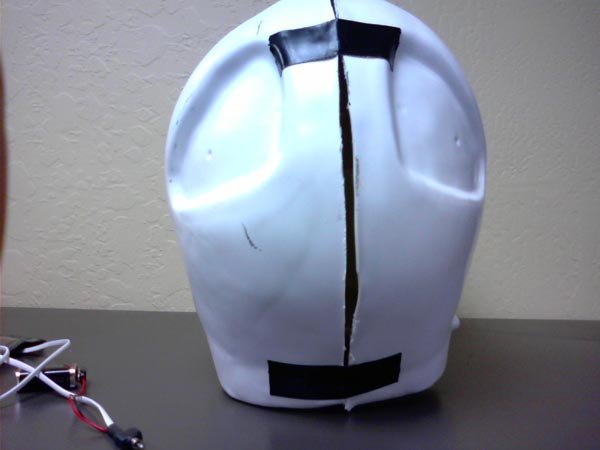
This is the back-
Okay, can't let this thing whoop me.
Fortunately vacu-form works off of heat, and hair dryers make heat. Having gone to high school in teh late 80's I know a thing or two about hair dryers. The trick to this is constant ambient heat, too much focused heat, you will go SHHHEEIIIIII.... in slo-mo as a hole suddenly and unstoppably opens up in the plastic. Not enough, and nothing will bend. I tend to put my hand on the opposite side of the area I'm trying to affect, and use swishing motions with the dryer on the other side. This way if the plastic gets too hot, it will suddenly graft to the flesh of the hand on the opposite side as punishment. If you have one of those industrial heat guns, they work better, but also heat faster... crunch the numbers.
So what I;m doing with both hands (so I cant take pictures) is bending the lips of the edges toward each other. Edge should face edge, so I can make as smooth a seam as possible. At the same time, I'm shaping the overall shape of the helmet to be closer to symmetrical. If I NEED to get some droopy edge to stay, I heat it, shape it, then shock it with cool water so that it doesn't droop when I'm not looking.
Once I get the edges all facing in, I tack some pieces of rigid sheet plastic on the inside. ~5x 1" squares are tacked tactically on the inside with super glue. Now I can heat up the whole helmet slowly and tweak it's general shape. On this one, the crest of the helmet was way high giving a mohawk look. I actually left a little extra space at the top between the seams and formed the top to a wider, flatter profile.
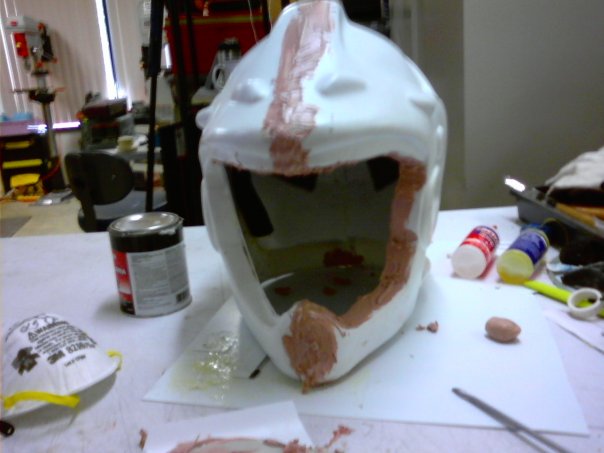
After a few stiff drinks and a good nights rest, we move onto the filling shaping filling part of the program.
Bondo is a fickle lover. The good news is it fills and hardens to a nice sandable, smoothable compound. The bad news is it can be really picky what it sticks to. When I was a younger man of about eight, my father and I were sitting by the rail road tracks drinking a beer or six, a Camaro that had had some radical body work drive over the tracks. as it went "bump" over the tracks, all of the bondo they had used to fill the dents popped off. Dad exhaled sharply from his filterless lucky strike and said "Shoulda drilled more holes". At the time I had no idea what he meant, but now I know. You sometimes need to destroy things that they can be reborn. Making holes or scraping up the surface will give bondo something to grip on.
In this case, where i filled the seam there was plenty of hole, but other places on the form that needed more help than heat shaping could provide needed some fill too. Each of those spots got a 1/8" hole drilled for every inch of surface. The bondo oozes out the back like a bad decision at the taqueria, and hardens into an anchor.
I cut some sheet styrene to back the bottom jaw and insides, cutting enough space to run the side LEDs, and still far enough back to mount the side padding on. I literally used the heavy epoxy like I was welding 1/4" steel plates between the sheets and the helmet. I then used bondo to further fill, stick and shape the parts. A motivated person could supplement this with fiberglass.
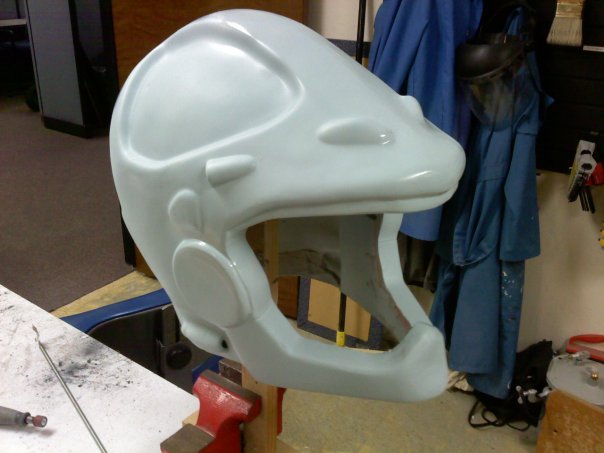
This now becomes a heinous process; once you think it looks awesome, give it a coat of a light color low or zero build primer. You will now see what a feeble sanding job you did. Add more bondo and sand more!
Do this about nine or ten times until you realize trying to get 1/8" vacuformed styrene perfect is like trying to polish a turd, give up and give it one more coat of primer.
Come to find out it's not as bad as you thought.
Next up, electrocution 101.
I really enjoyed reading this, Anders, even though the chances of me attempting it for myself are rather low (read: nil). You are quite the engineer! I'm really sorry about Carol and those like her. You've given me a good blogging idea and possibly a story idea as well. Fun!
ReplyDeleteGreat and very detailed! I haven't checked, but have you submitted it to Instructibles? If you haven't, I think you should :)
ReplyDeleteAwesome Post! So when do we get part 2 with the flightsuit patterns ;-)
ReplyDeleteThanks ,,,
ReplyDelete5 Business Blog
Spanish Management Blog